Pages

Thursday, July 5, 2012

Start Menu Customization

Start Menu in Windows 7 can be customized according to user‟s need. All the items in Start menu can either be set as display link or set as menu. Apart from it there are several more things to configure.
Steps are here:
1. Right click on Start Button or taskbar (Super bar) of Windows 7

 2. Click on properties. It will pop up Task-bar & start Menu properties.
3. Select the tab "Start Menu". This will bring you Customize & Privacy options.
4. Select Customize button there.

5. You can select the behavior of items in Start Menu. If you want them to behave as link, Menu or Icon.
6. Behavior of items like my computer, Downloads etc. can be set.
7. Also you can choose default settings if you wish to undo all the changes you have done.
8. Click OK to apply the changes.

Wednesday, July 4, 2012

How to Create Themes in Windows 7

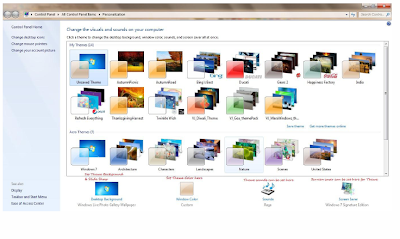
In Windows 7 it is possible to personalize and customize windows 7 with self-made custom themes. Windows 7 has several default themes and you can create your own Windows 7 themes using the steps below. Also there has been launch of Several Official Themes from Microsoft time to time.
A theme pack contains following things:
  • Desktop Wallpaper
  • Screensaver
  • Sounds
  • Slideshows
  • Color of the theme
  • Mouse Pointers
  • Desktop icons
And good thing about Windows 7 is you can customize all of these without pain.

1. Right Click on your Desktop and Select Personalize from Context Menu
2. Now click on desktop background to set background wallpaper of Theme.
3. Click Browse to locate folder of wallpapers
4. Select check images/wallpapers for slideshow feature in your theme & save changes.
5. Set Windows color to change color of windows, background, and cursor for theme.
6. Click on sound to change system sound default
7. Click on Screen Saver to set screen saver for the Theme.
8. After setting all the components of the Theme Pack click on save theme option in your personalization window.

9. Enter theme name and select themepack as save type
10. Double Click on the theme pack to install it.

Dock Windows to Left Right Up down

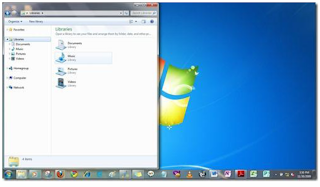
Windows 7 comes with an interesting feature through which managing all the open Windows becomes easy. Document and program management is simplified by allowing “docking” a window or changing its size with a simple key combo or a mouse click.
To dock half size window on Left Side of Screen:
Mouse Action: Drag the Window to left
Keyboard Action: Press Win + Left Arrow


To dock half size window on Right Side of Screen:
Mouse Action: Drag the Window to Right
Keyboard Action: Press Win + Right Arrow
To maximize window on Screen:
Mouse Action: Drag the Window to top
Keyboard Action: Press Win + Up Arrow

Display Multiple Clocks in System Tray

Many users need to keep track of time in multiple time zones, there‟s a nice feature in Windows 7 to help users keep track of time in Multiple Time zones. The feature is multiple clocks in your system tray. This feature can display up to 3 clocks in your taskbar from 3 different Time Zones.
Click on
Click on the Clock in System tray
Next, click on the „Change date and time settings‟ to open Date and Time Window.
Click on the tab for Additional Clocks.

Here you can add up to two additional clocks .Enter time Zone and Clock Display name.
Check the „Show this clock‟ box to enable the clock.
Click OK.
Hover over the clock and it would show you Time in text for all 3 Time Zones (including the one your Local one).