In Windows 7 it is possible to personalize and customize windows 7 with self-made custom themes. Windows 7 has several default themes and you can create your own Windows 7 themes using the steps below. Also there has been launch of Several Official Themes from Microsoft time to time.
A theme pack contains following things:

A theme pack contains following things:
- Desktop Wallpaper
- Screensaver
- Sounds
- Slideshows
- Color of the theme
- Mouse Pointers
- Desktop icons
And good thing about Windows 7 is you can customize all of these without pain.

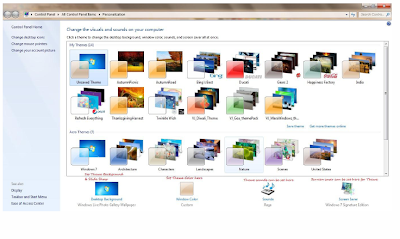
1. Right Click on your Desktop and Select Personalize from Context Menu
2. Now click on desktop background to set background wallpaper of Theme.
3. Click Browse to locate folder of wallpapers
4. Select check images/wallpapers for slideshow feature in your theme & save changes.
5. Set Windows color to change color of windows, background, and cursor for theme.
6. Click on sound to change system sound default
7. Click on Screen Saver to set screen saver for the Theme.
8. After setting all the components of the Theme Pack click on save theme option in your personalization window.

9. Enter theme name and select themepack as save type
10. Double Click on the theme pack to install it.
10. Double Click on the theme pack to install it.
thats really joking......
ReplyDelete